9 Tips for a Successful Move

Photo courtesy of University Movers

Photo courtesy of University Movers

It’s that time of year!  Leases are turning over all throughout Manhattan and moving trucks abound.  Whether it’s from one apartment to another, from an apartment to a new house in the ‘burbs, or one house to another, moving can be stressful.  You can have all of the grand visions in the world of making it romantic (candle-lit pizza dinner on the empty living room floor?) but inevitably, the logistics of the move are going to get in the way and stress takes over.

For those of you who are open to it, this is the PERFECT time to hire a Professional Organizer, many of whom specialize in relocation and moving.  But for those of you who want to do it on your own, here are my best tips for staying organized while moving:


1. PREPARE

Depending on the amount of “stuff” you have, make sure you start working far enough in advance of your move that you can handle a little bit every day, and not rush towards the end to pack.  


2. TRASH AND DONATE

 The goal is to go through all of your things prior to moving and trash or donate what you don't want.  This will mean that you don’t spend time and money to pack, move and unpack items that you don’t really need.   In reference to Tip 1, it is important that you start ahead of time, because there is often a limit to how much trash you can provide at one time, both in apartment buildings and curbside at your suburban house.  Do the research before-hand to find out if there are restrictions.  Talk to your building management, talk to neighbors, research online, call your town – just make sure you know.  If you DO find yourself in a pickle with more trash than you are allowed to get rid of, never under estimate the power of a good tip to the people who handle your trash.  Otherwise, make an appointment with a junk lugging company, but keep in mind, it will cost you!  Similarly, charities that perform donation pickups often have a waiting list and may not be able to give you an appointment for a few weeks, so keep that in mind when you call to schedule.


3. HAVE THE RIGHT SUPPLIES

The basics are:

Photo courtesy of EZBins

Photo courtesy of EZBins

  1. Moving boxes – A variety of sizes are recommended.  Boxes can be expensive, so you can use resources like Freecycle and Craigslist to get used boxes.  For those of you in Manhattan, you can use my favorite resource, EZBins.  Ez-bins provides you with plastic moving containers, delivered right to your door, and picked up empty from your new place.   At less than $5 per box, these eco-friendly boxes save you the time of shopping for boxes and tape, and save you money as well. 
  2.  Packing tape – Get one dispenser and large packages of refill tapes for the most economical solution.  Use this to build boxes and seal them up once filled.  Also important to wrap items with below packing materials.  This item isn’t needed if you use EZ-Bins.
  3. Packing paper – I prefer clean, solid newsprint.  Old newspapers are the most economical choice, but beware that ink can transfer onto the items around which the newspaper is wrapped.  Packing paper is perfect for items whose surfaces need protection from scratching and dirt, but aren’t very fragile.  Example: pots and pans.
  4. Packing foam – Great when you need layers of protection in between items without using a lot of space.  For example:  Layer in between plates and bowls.
  5. Bubble wrap – Use for really delicate items.  Example: crystal stemware, perfume bottles, bottles of wine and liquor.
  6. Markers – So you can label, label, label!
  7. Color coding labels – Perfect for color coding your boxes.  Remember to label your master list as well, and for extra clarity, stick a colored dot on the door-frame of the appropriate room in your new house to help the movers know where to place the boxes.
  8. Pad of paper for inventory lists – See below on the importance of inventory lists.


4. KNOW BEFORE YOU PACK

There ARE best practices in packing.  Here are some tips:

  1. Don’t place too many very heavy items in one large box.  Using smaller boxes for heavy items makes them easier to transport. 
  2.  Always ensure sharp edges, like knife blades, are properly wrapped for protection.
  3. Stack plates horizontally (like filed papers), they are less likely to break this way. 
  4. Use household items as packing paper when possible.  Kitchen towels are great for wrapping around bowls. 
  5.  Use small zip lock bags for small items so they don’t get lost as you move.  This is especially important for screws and other small construction parts for furniture that has to be disassembled for the move.  Put those parts for each piece of furniture in a labeled Ziploc bag and keep it on your person when you move.  Then you can hand those bags back out in your new home to whoever is reassembling the pieces of furniture. 
     

5. PACK BY ROOM

Ensure items to be placed into the same room in your new home are packed together.  This will make your life much easier when you are unpacking.  Label boxes with the name of the room where they should be unpacked, (labeling conventions below) so they can be delivered right there. 


6. LABEL YOUR BOXES 

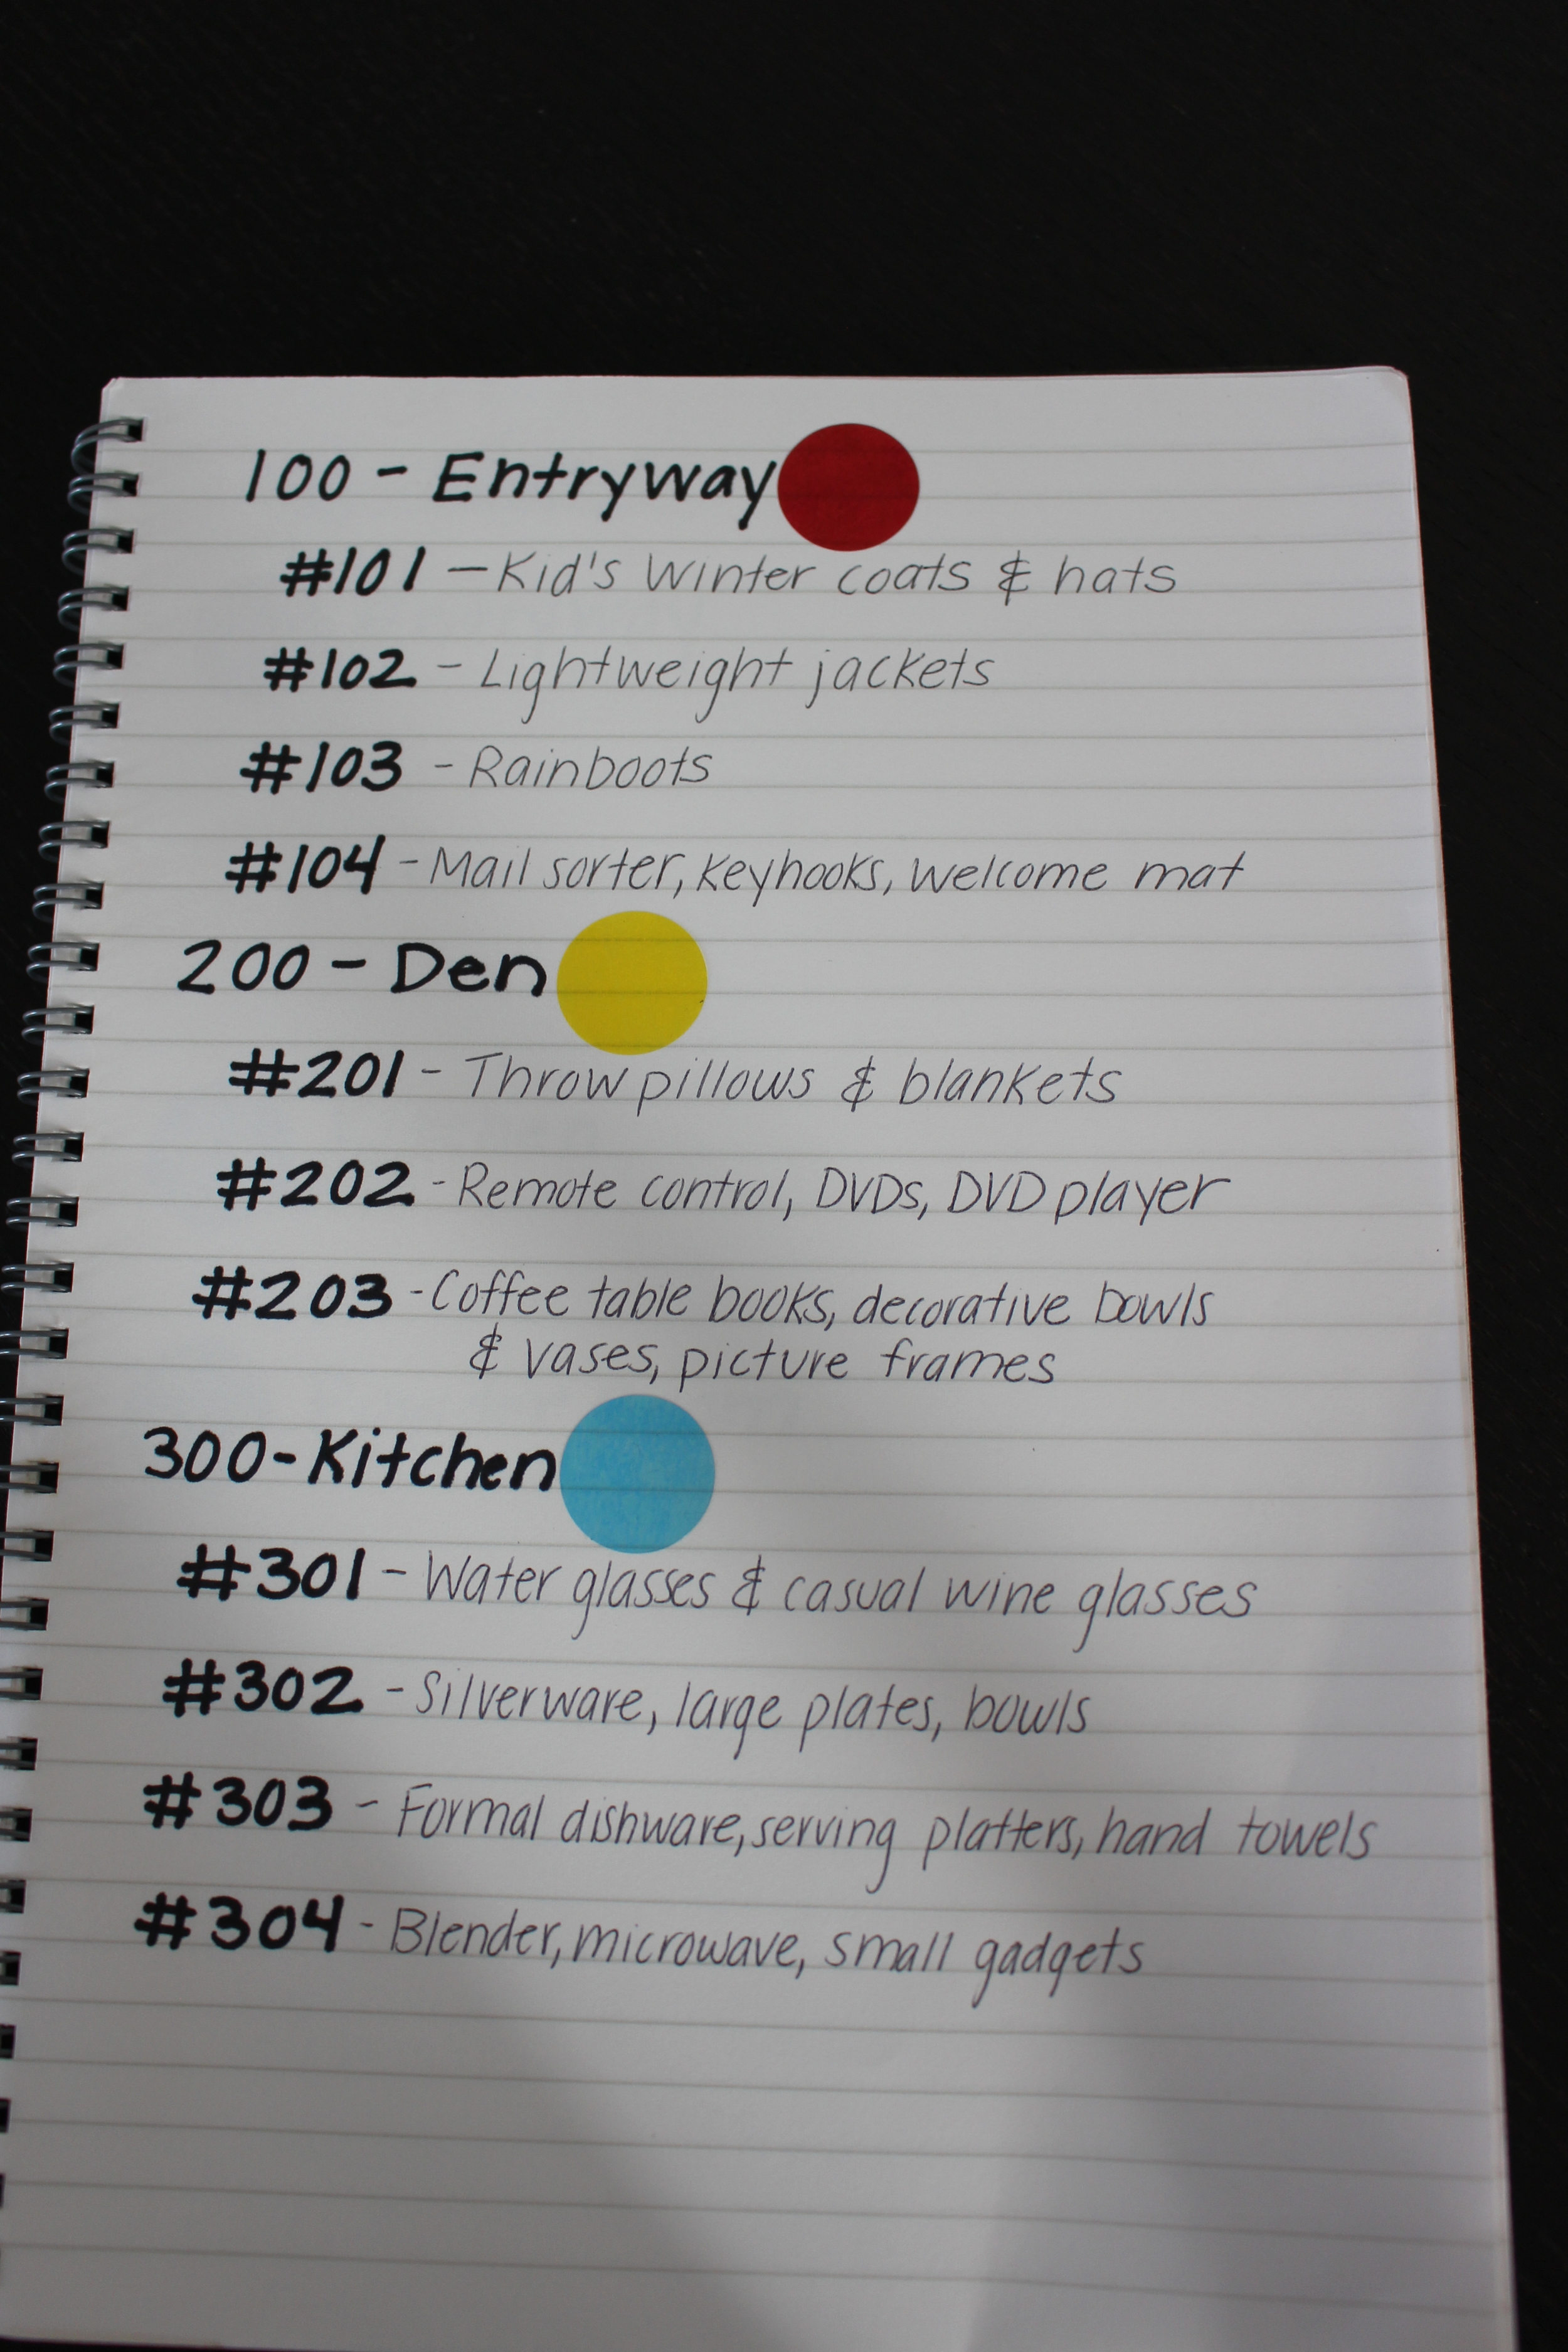
Box List.JPG

Right away.  Before you seal them up.  Trust me on this.  Label them broadly by room (“kitchen”, “master bedroom”, “Den”) and then list an overview of contents.  Some people recommend color-coding by room, some find it much easier to label each room by number.  There’s no harm in using both methods.  Here’s a list using both methods.


7. CREATE A MASTER LIST

Moving Key.jpg

TWICE.  As you pack, create a master list of your boxes and their contents and create a key to help you identify how you are labeling your boxes.  Then, make a copy of your master list.  One copy may get lost in the shuffle of the move, so having a backup copy is always recommended.  You can manually write it, photocopy it, or take a picture on your phone to keep it digitally.


8. KEEP IMPORTANT ITEMS WITH YOU 

Whenevever possible, keep important items on your person.  While your moving company will be insured and most are trustworthy, there are just some items that are too valuable to risk putting in boxes and sending off with someone else.  These include:

  1.  Valuable papers like birth certificates, passports and current financials
  2. Money and credit cards
  3. Valuable jewelry
  4. Prescription medication


9. CREATE A MOVING KIT

My final piece of advice is to create a moving kit for yourself.  This will vary depending on the number and type of people included in your move , as well as where you are moving to and how many days it will take you to travel.  No matter the details of your move, your move kit should include items that you will need access to immediately upon arriving at your new home, if you won’t have immediate access to purchase them.  For example, a client recently moved from a home in one suburb across state lines to another home.  We sent the moving truck off, and then they drove to meet the moving truck at their new home early morning 2 days later.  The closest drugstore and supermarket were a 10-minute drive from their new home.  For them, we packed the following: 

  1. Two days and nights worth of clothing and toiletries for travel and move-in day.  Pack like you are going on a weekend trip. 
  2. 2 rolls of toilet paper and 2 bottles of inexpensive hand soap
  3.  1 roll of paper towels, windex and general household cleaner
  4. Snacks: pre-washed apples, pretzels, bottles of water, energy bars
  5. 1 packet each of plastic plates, cups and utensils
  6. 1 box of large garbage bags


At the end of the day, preparedness and organization are the key to any successful move!  Hopefully these tips will help you during your next move!  What are your personal moving tips?


Coralling Those Plastic Bag

Plastic bags are a problem.  We all have them.  We get them from the supermarket, the drug store, the hardware store…and we don’t throw them away.  We use them for all sorts of things – garbage bags for small trash bins, picking up after your dog, shoe bags for travel and the gym, and even lunch bags.  Even without an intended purpose, we know that they’re functional, so we save them.  And they accumulate.  And accumulate.  I can’t tell you how many times I’ve opened a cabinet under a client’s kitchen sink, or a closet by the front door, and had plastic bags shoot out at me. 

Luckily, there are a number of ways that you can keep these bags organized and still accessible!  Here are my favorite plastic bag organizers.

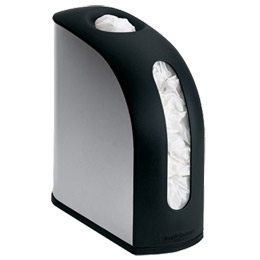
Simple Human makes two wonderful products to hold your bags.  Made of stainless steel and about $15 each, these are nice enough to keep out in the open if you need or want to.  One mounts to the wall, one simply stands upright.

Upright Grocery Bag Holder

Upright Grocery Bag Holder

Wall Mount Grocery Bag Dispenser

Wall Mount Grocery Bag Dispenser

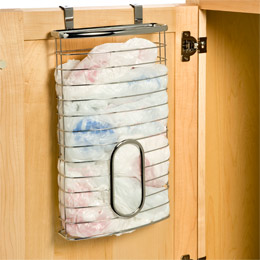
Axis Overcabinet Grocery Bag Holder

Axis Overcabinet Grocery Bag Holder

For those of you concerned about space, Axis makes a great version that sits right over your cabinet door.  You can get it from the Container Store for around $15. 


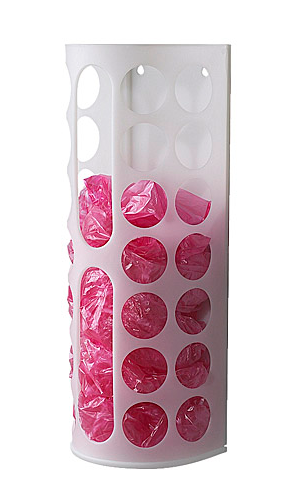
And for those of you more concerned about price, IKEA makes a wonderful version for just $2.  Nail it into the wall or inside of your cabinet for a more permanent solution, or use Command Strips for a less permanent one.  Command Strip instructions below.


IKEA Variera Plastic Bag Dispenser

IKEA Variera Plastic Bag Dispenser


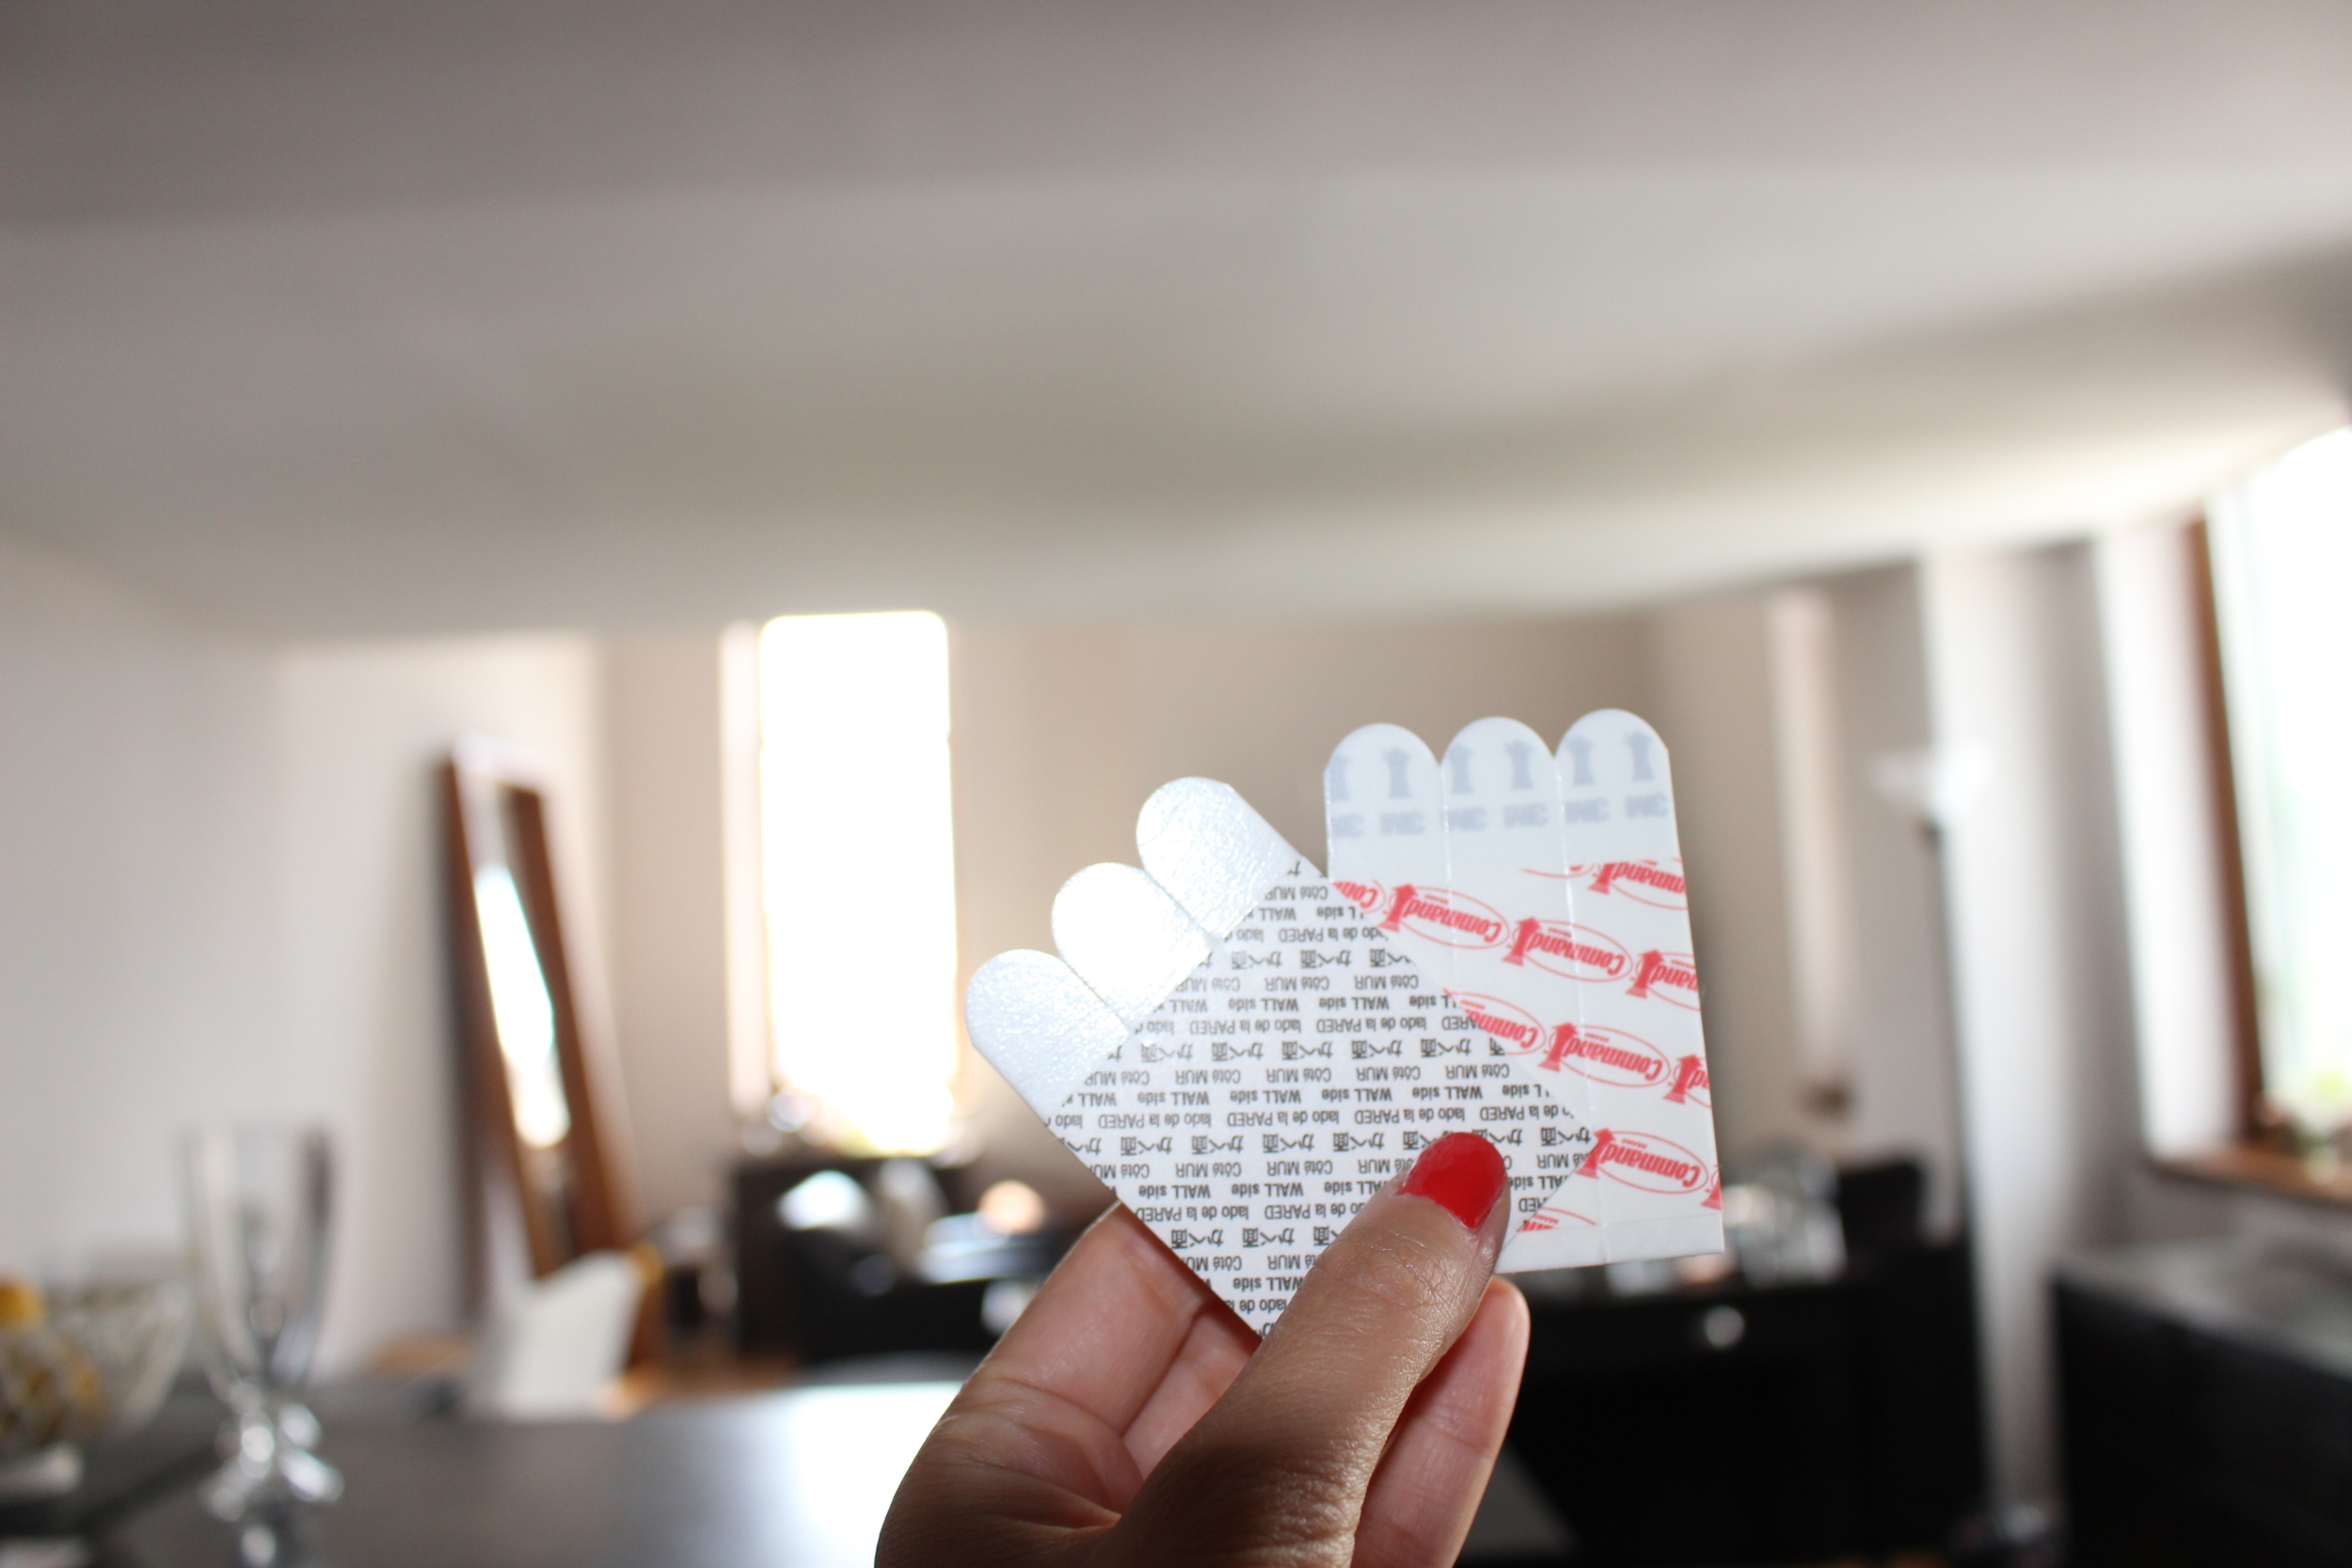
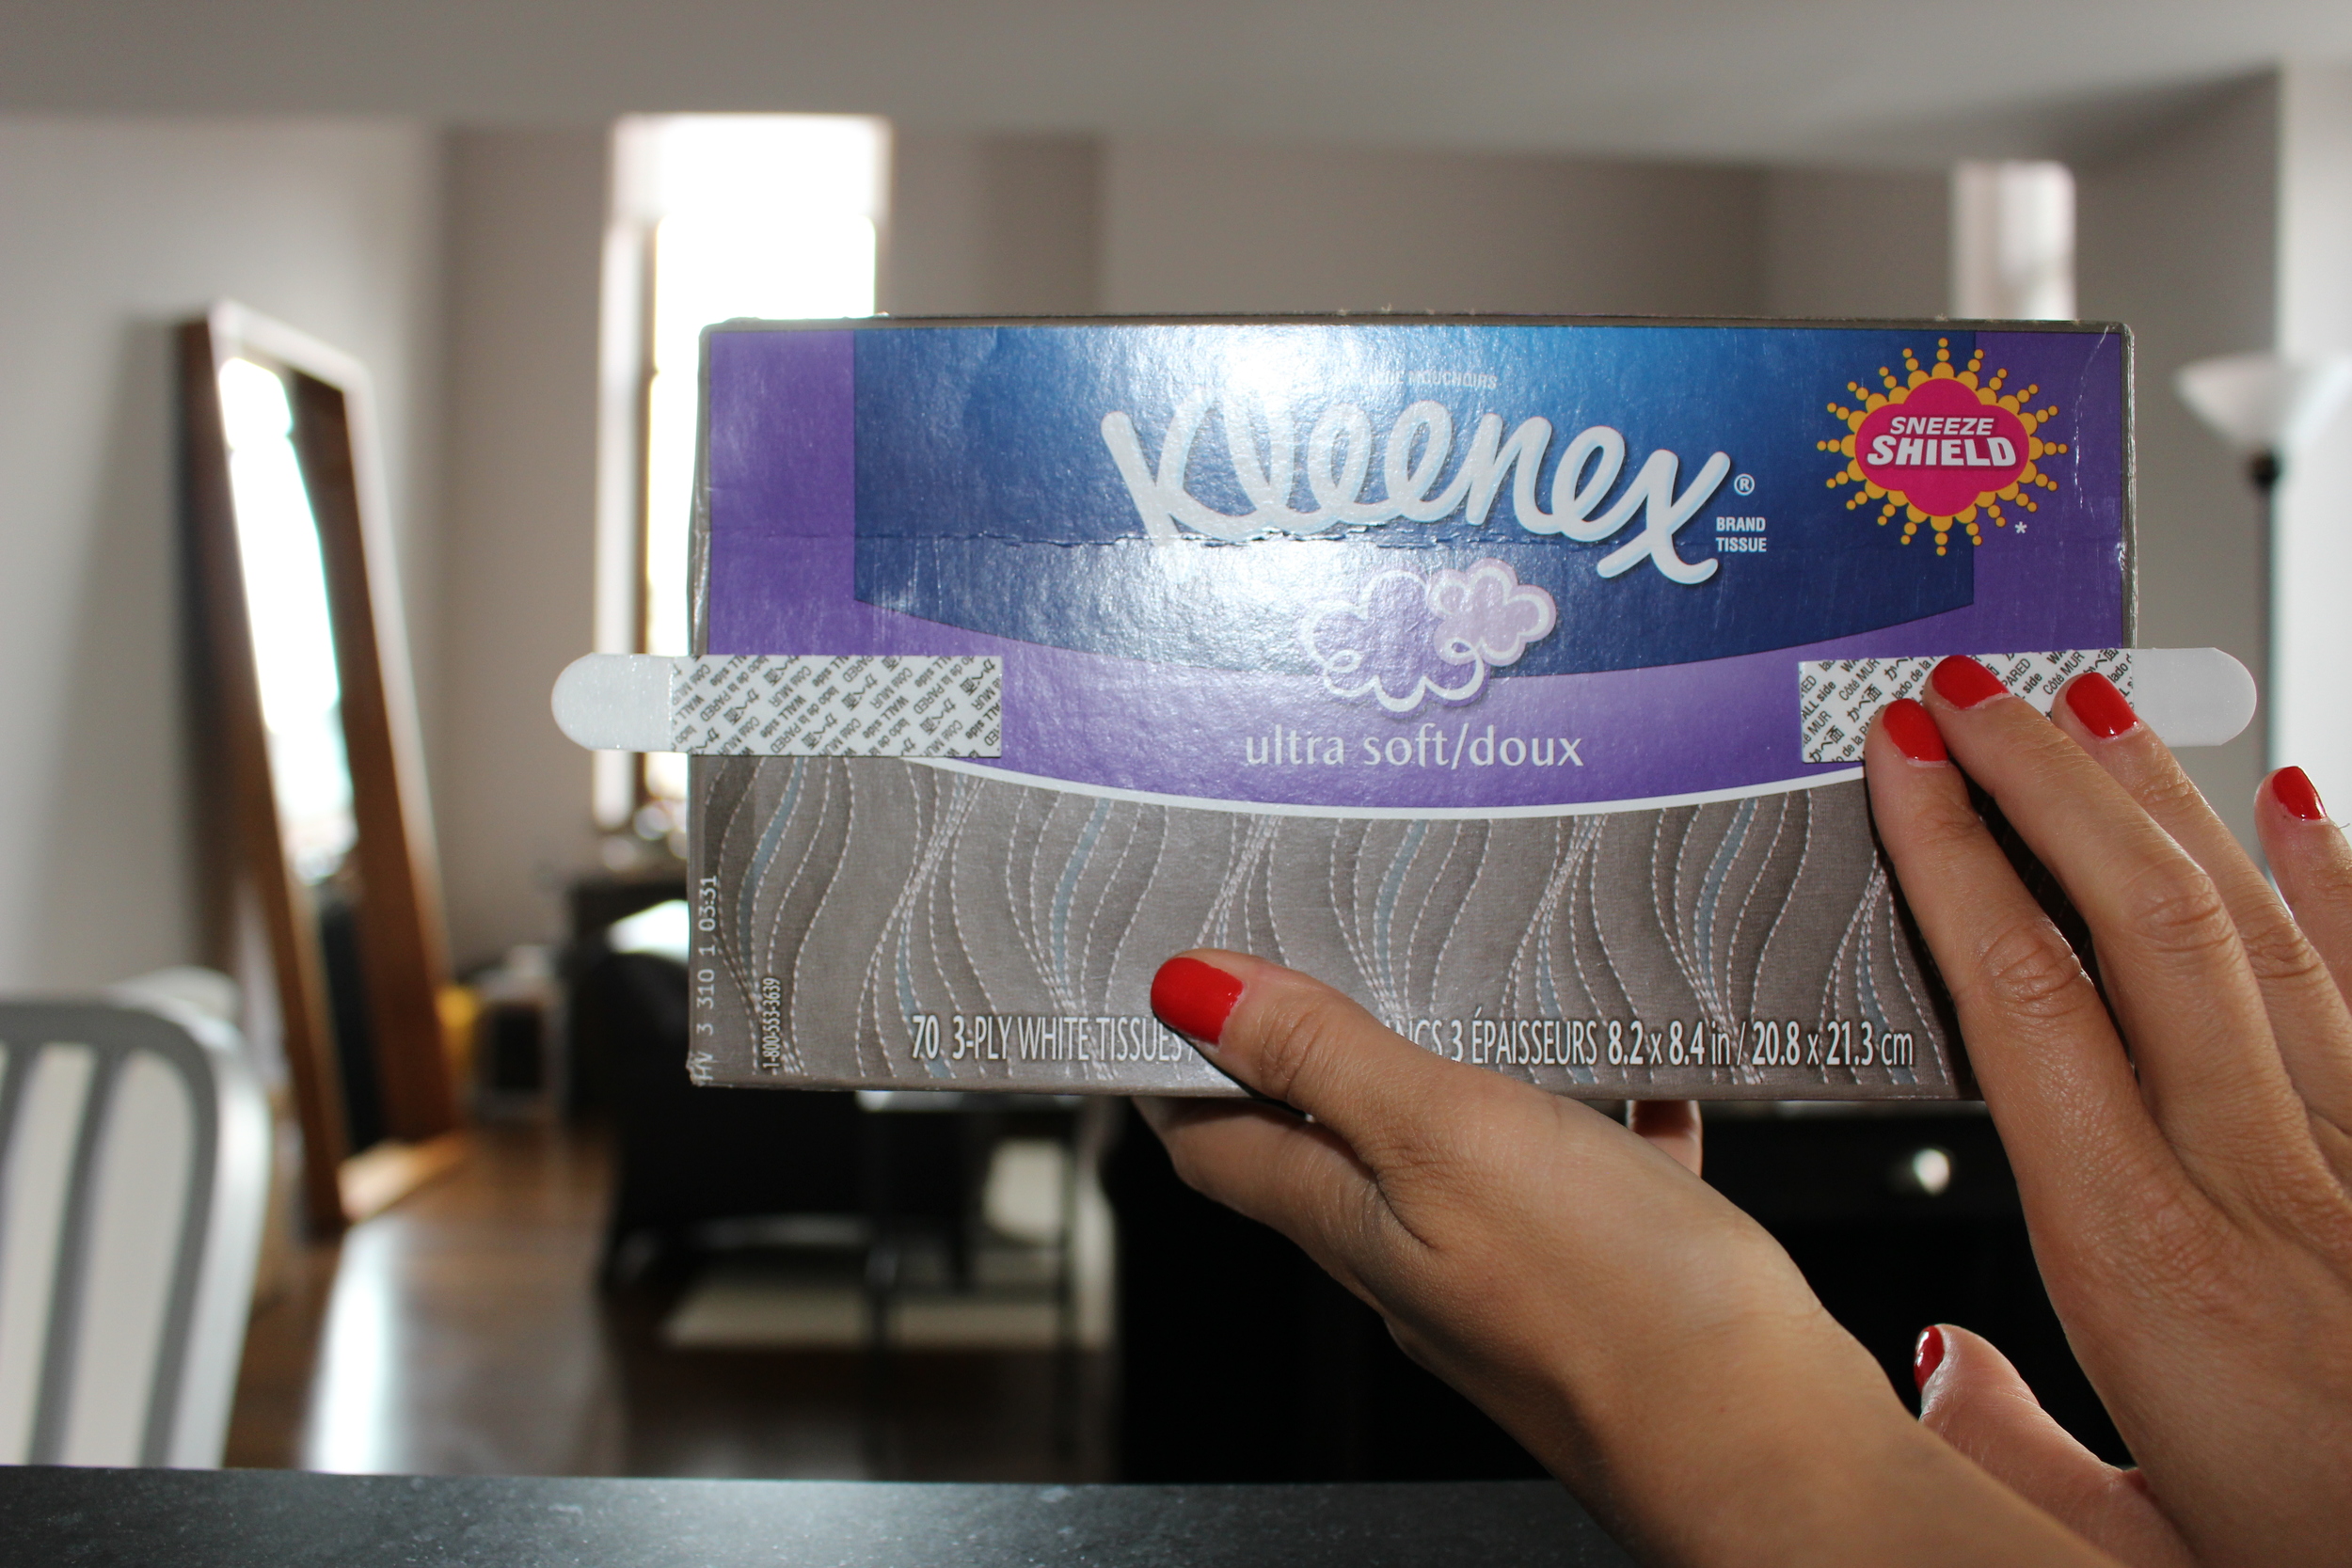
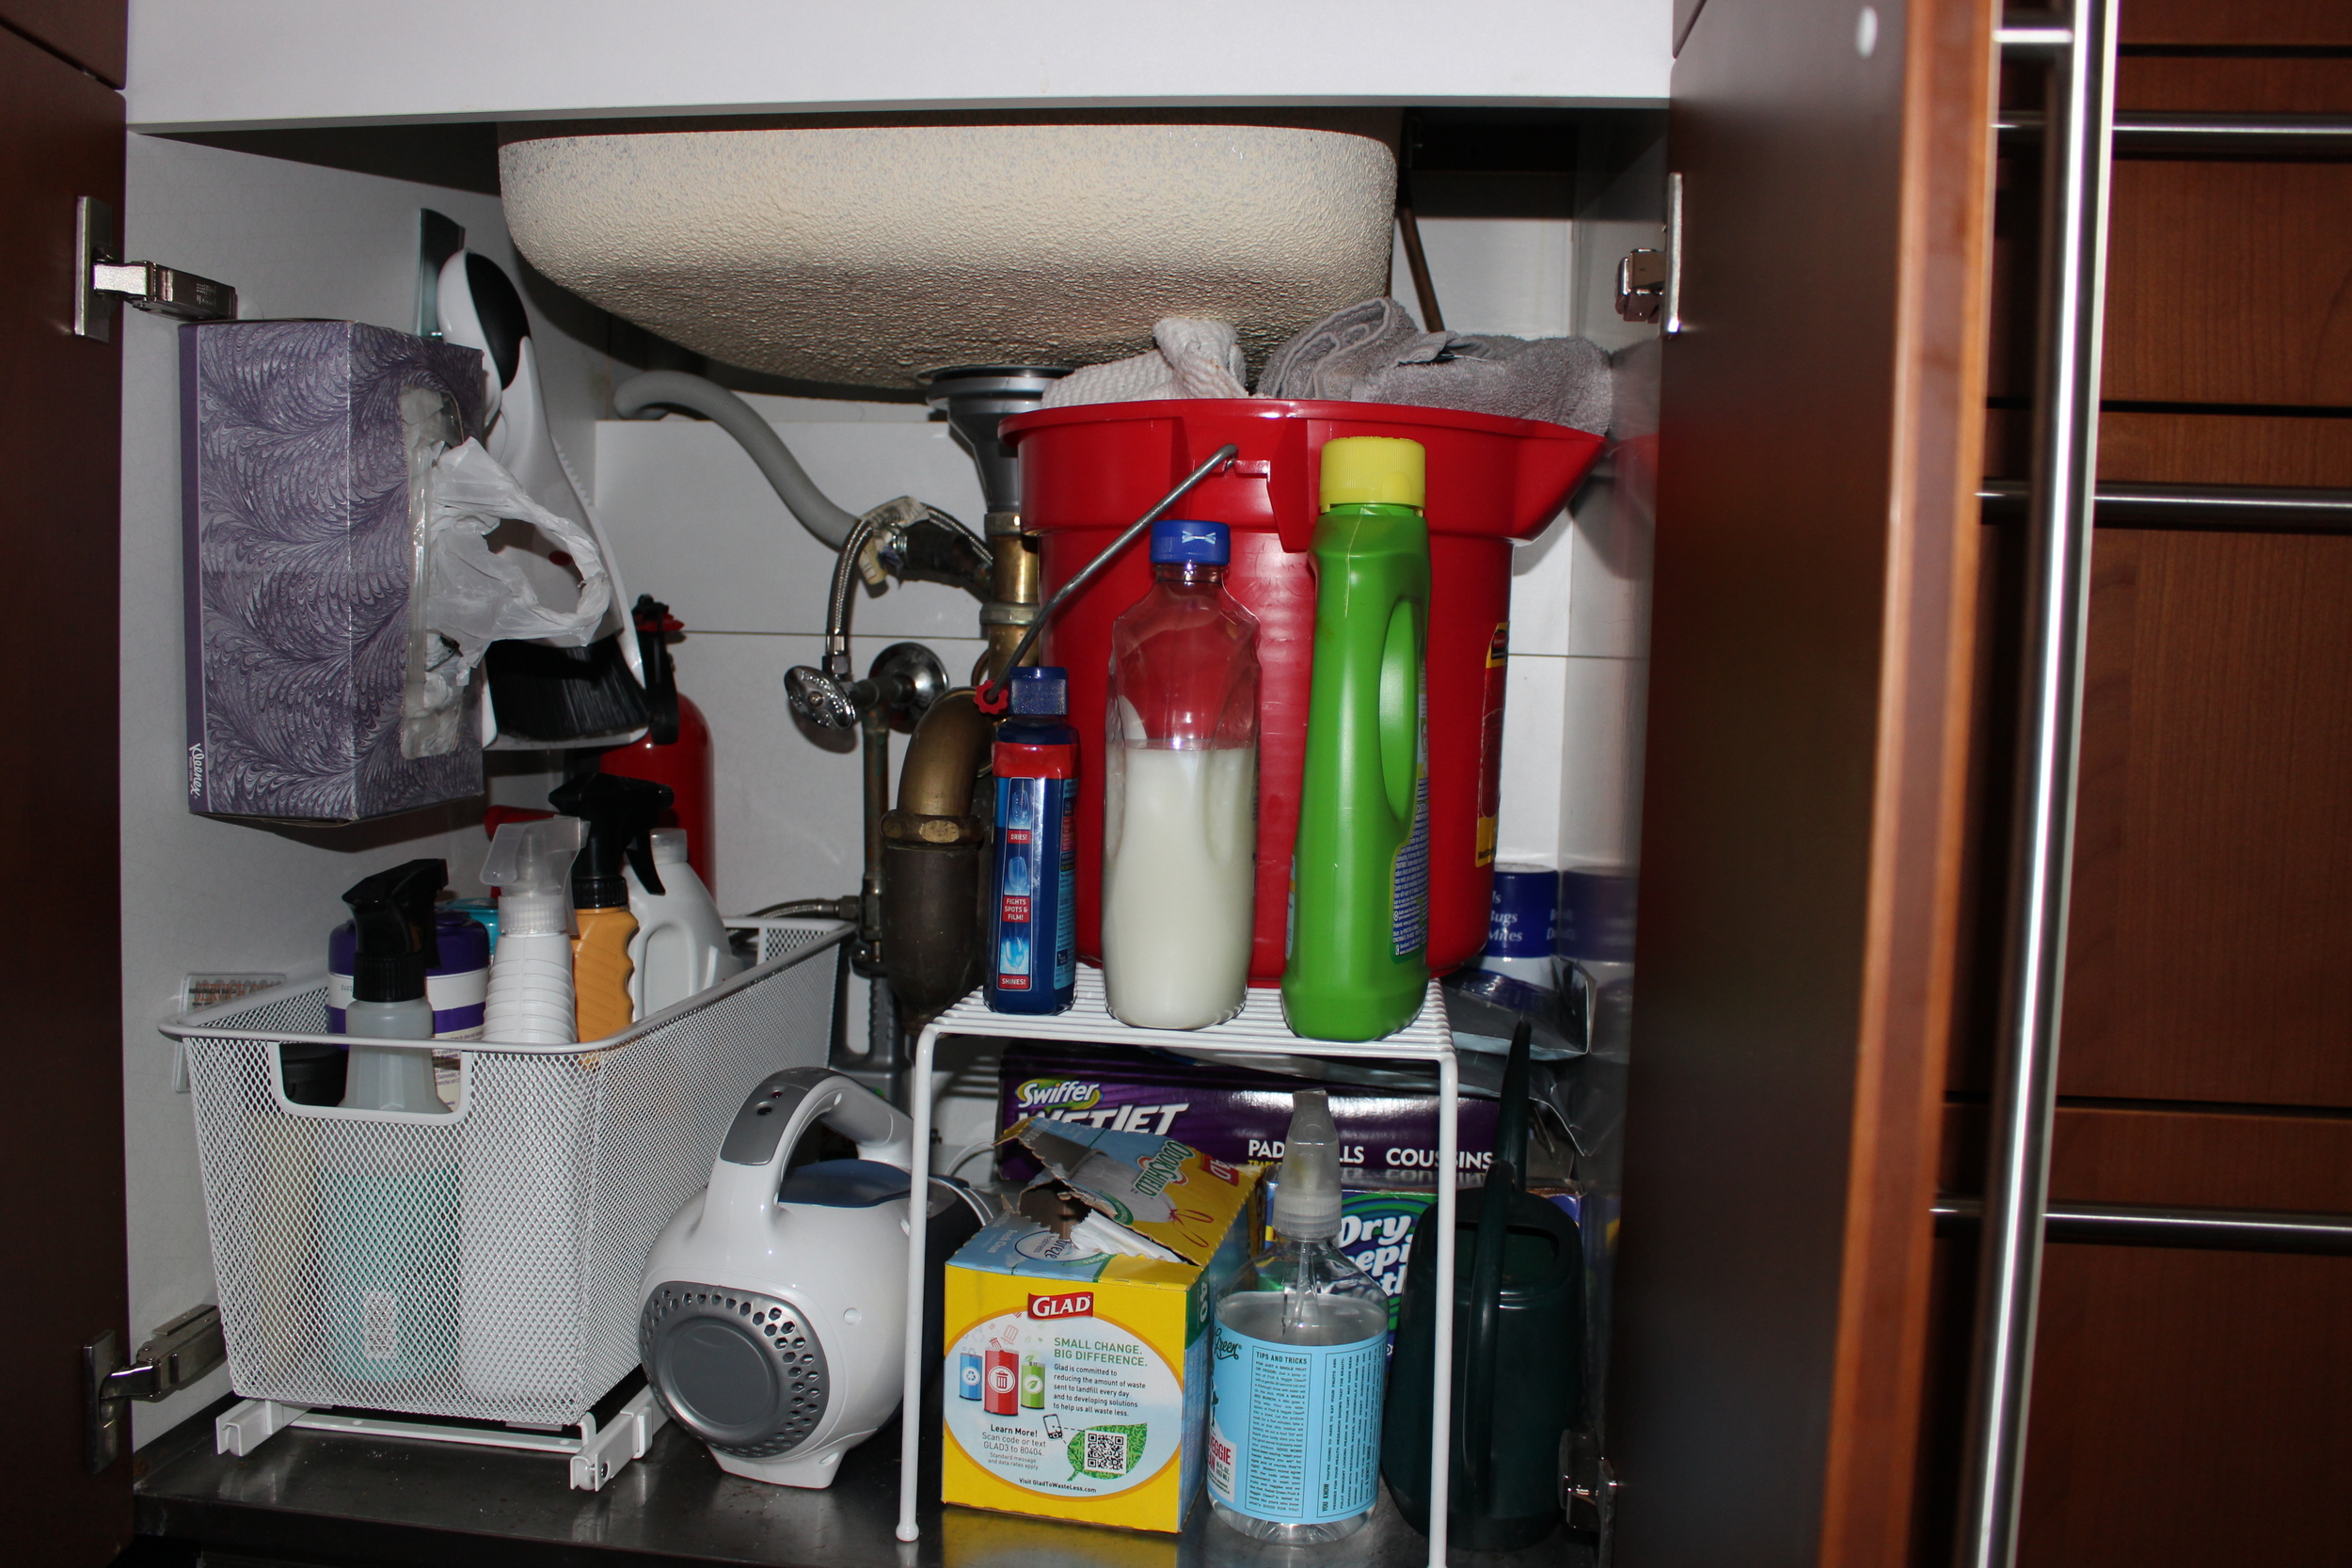
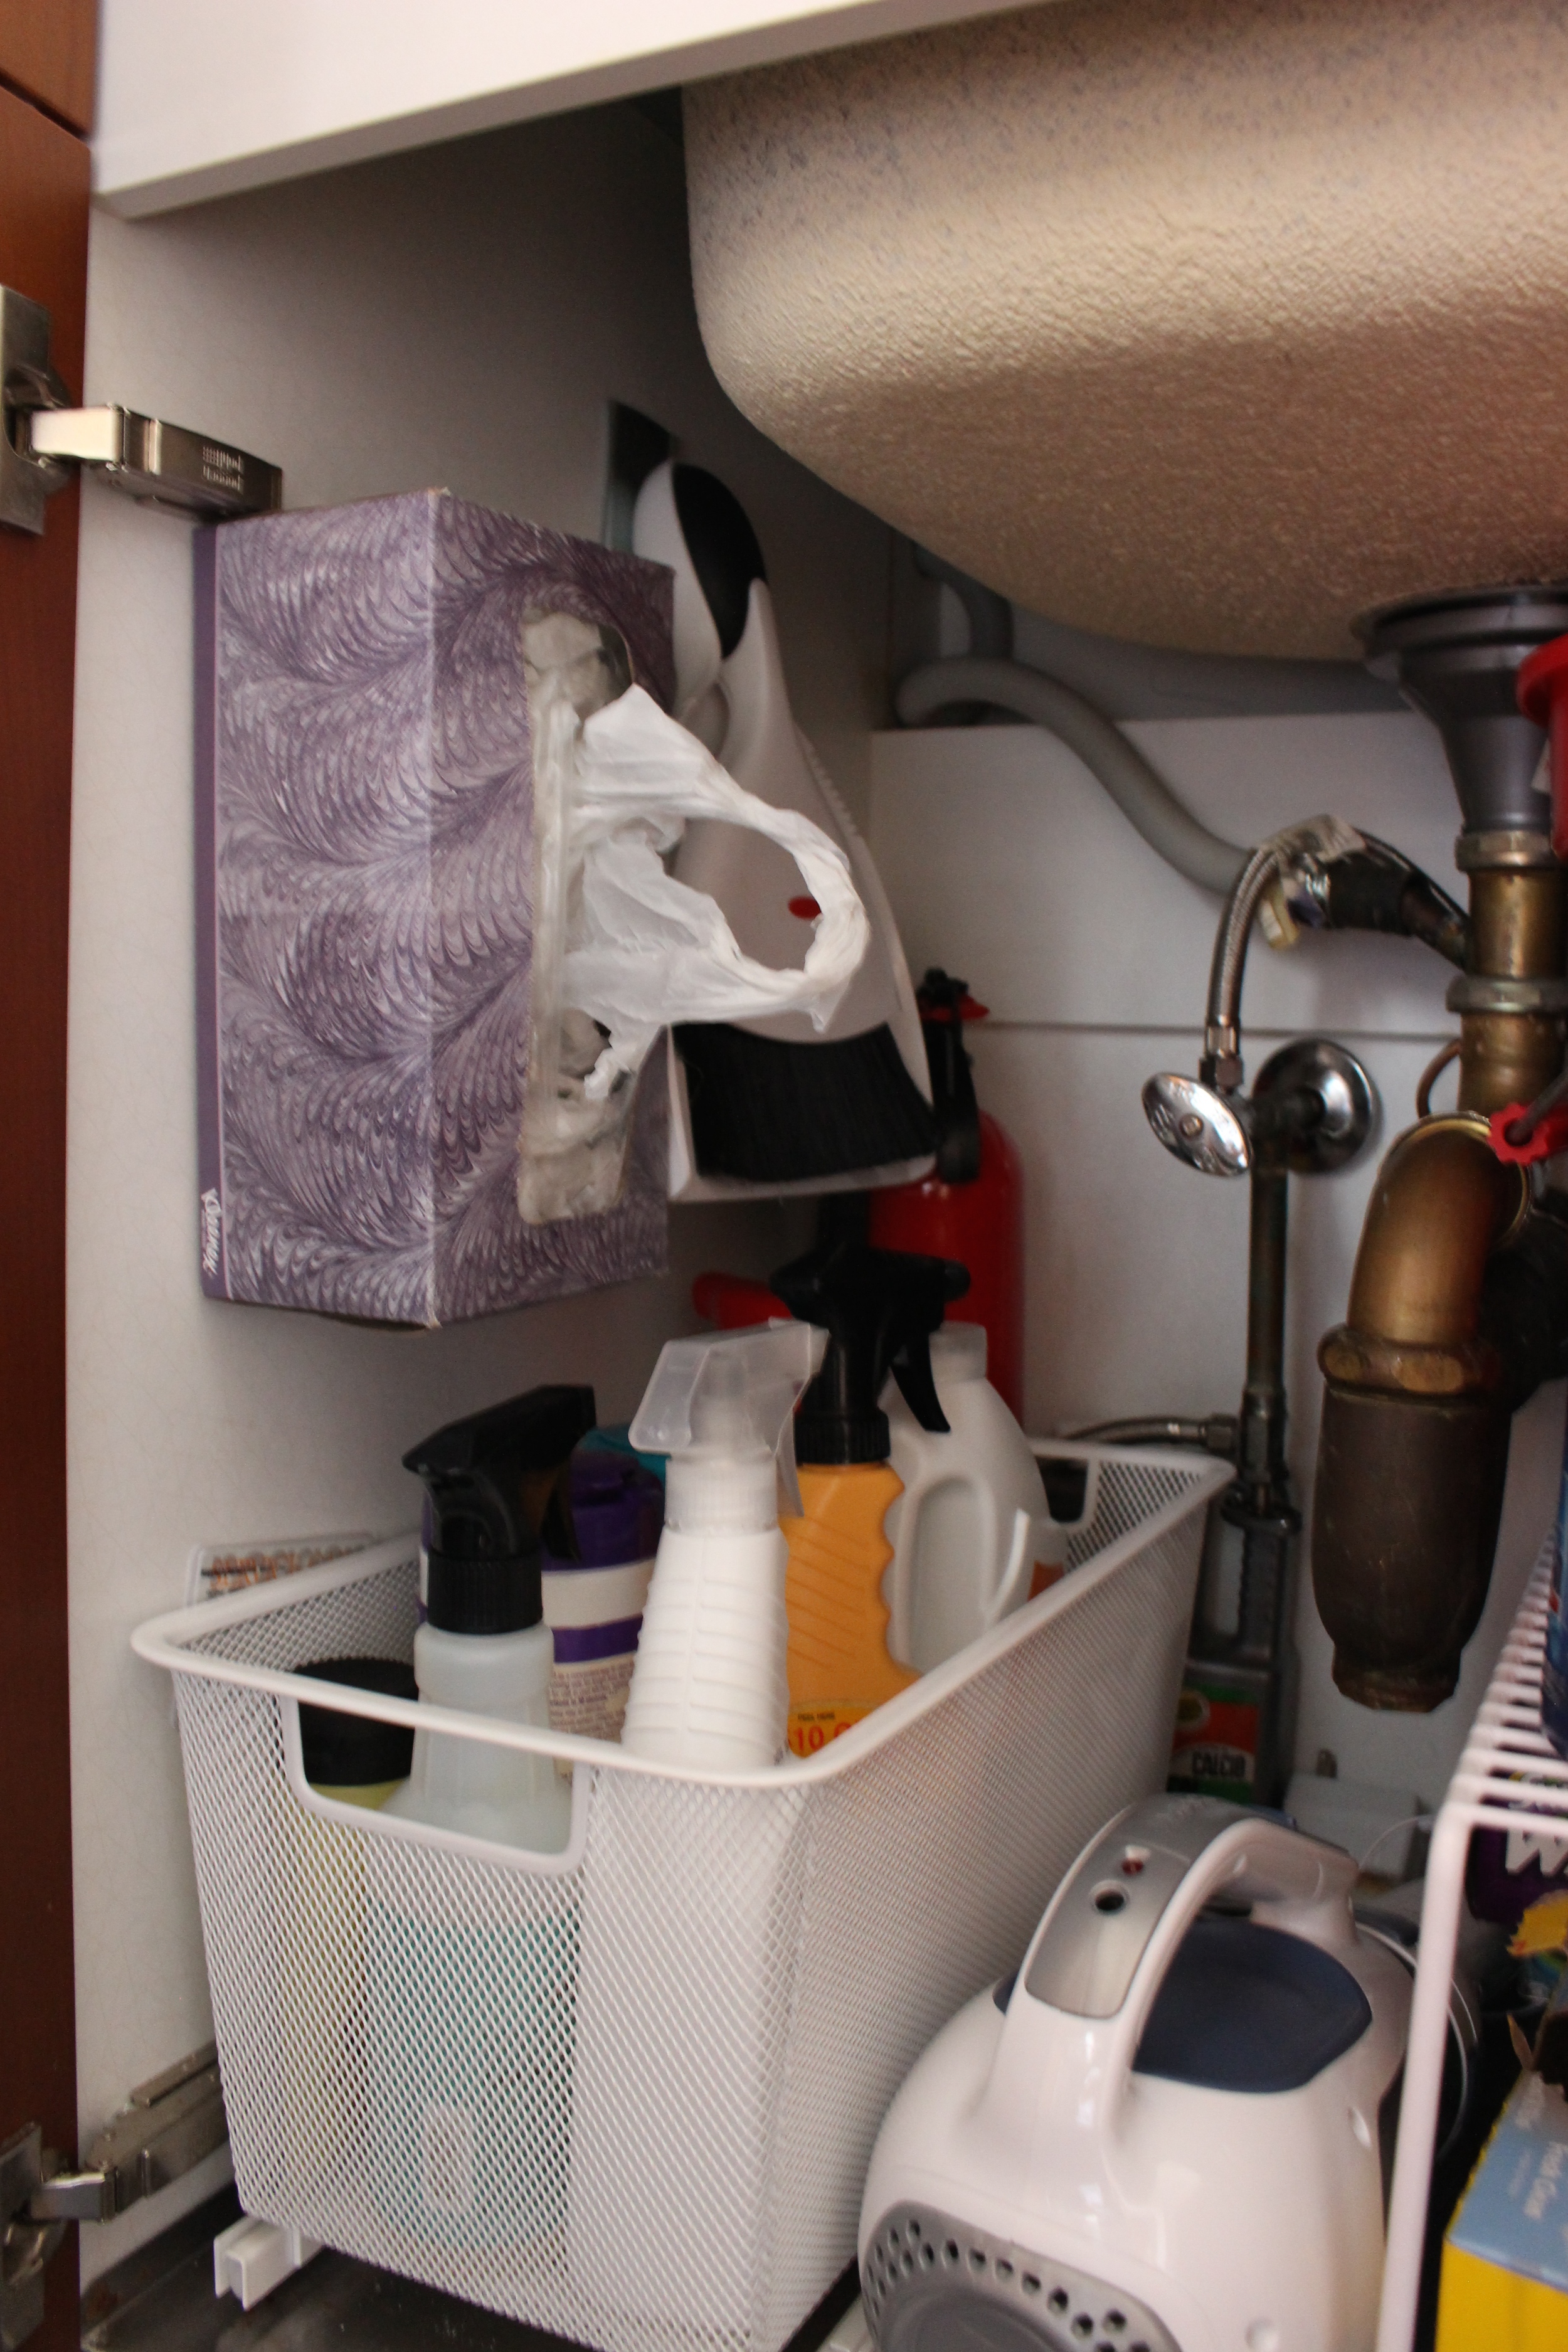
Then there is the DIY version.  I’m not much of a DIYer, to be honest, but this is one case where it is so simple, I couldn’t resist.  It's also the best way to customize this useful tool to the space you have.  It’s called the Tissue Box Organizer and trust me, you can do this.  Take any empty tissue box that best fits the space and depth available.  Stuff it with all of your extra plastic bags.  Grab a Command Strip and stick it to the inside of your cabinet.  Press the tissue box onto the strip and hold for 60 seconds.  And you're done!  You now have have yourself a PERFECT plastic bag dispenser. 

1) Purchase Command Strips 

1) Purchase Command Strips 

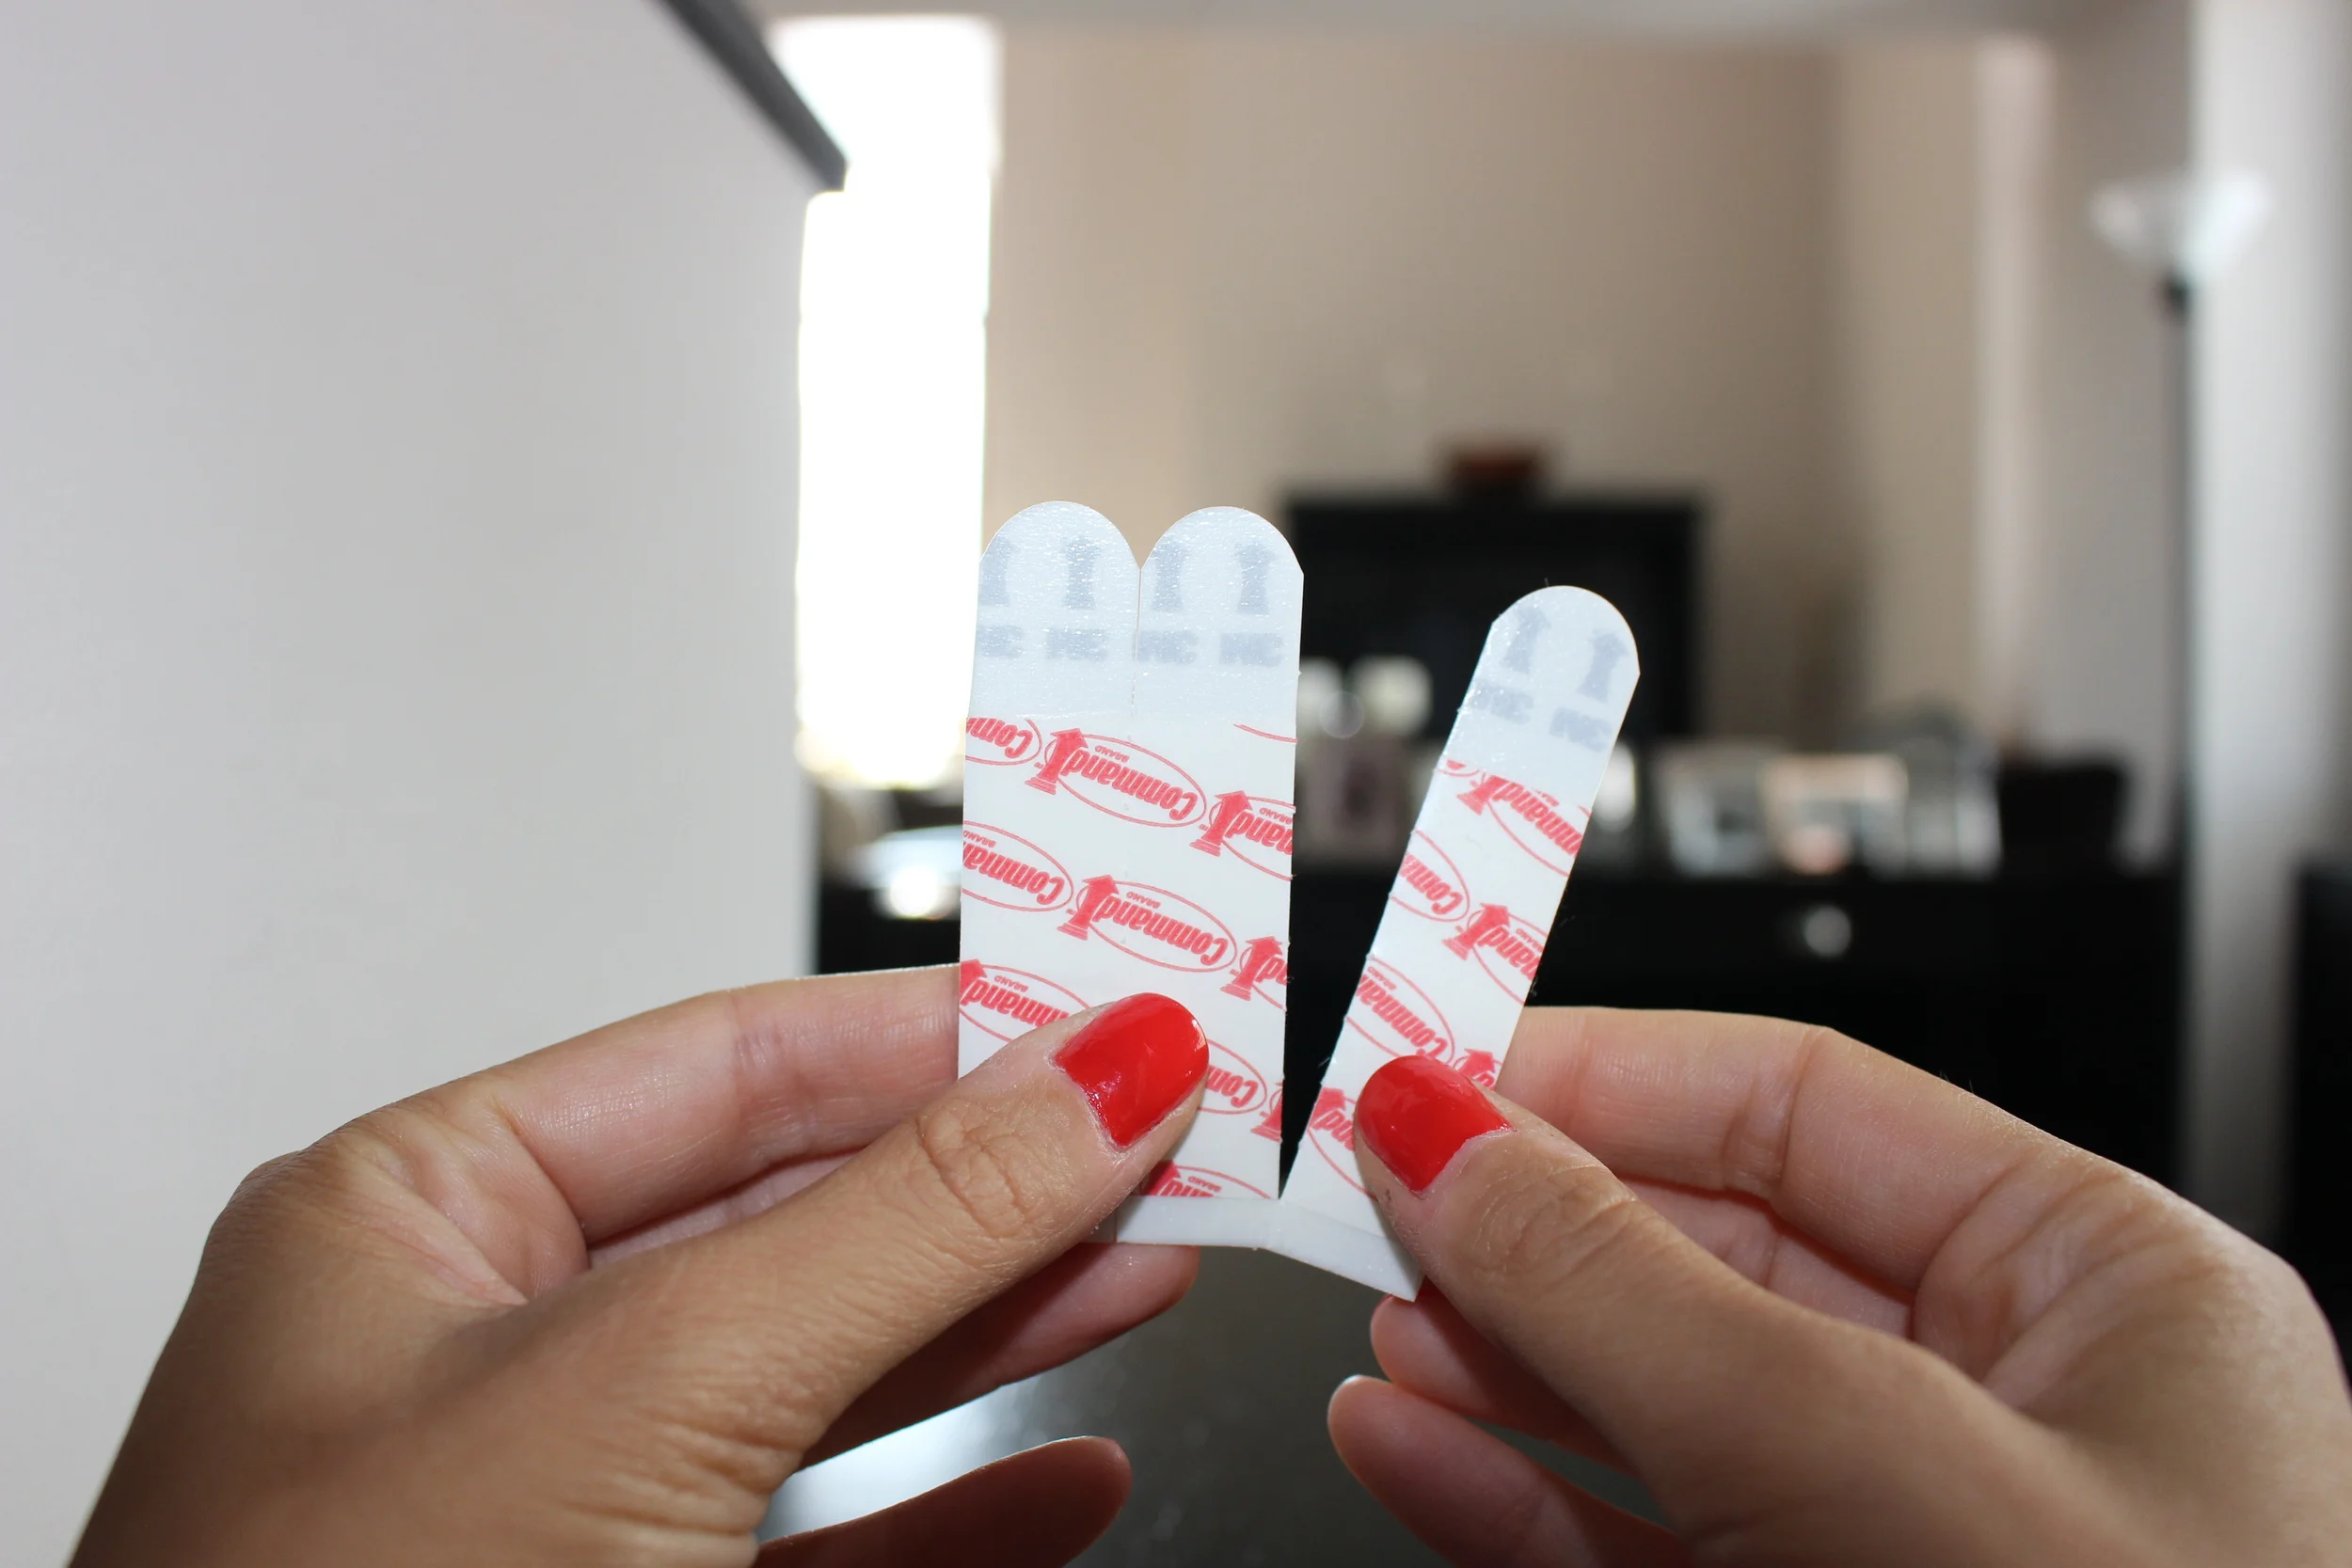
2) Separate two Commend Strips from package for use

2) Separate two Commend Strips from package for use

3) Peel

3) Peel

4) And stick!  Make sure you place the correct side of the Command Strip against the tissue box.  Peel strips indicate which side should be placed on wall (or inside of cabinet in this case!)

4) And stick!  Make sure you place the correct side of the Command Strip against the tissue box.  Peel strips indicate which side should be placed on wall (or inside of cabinet in this case!)

5) Et voila!

5) Et voila!

TissueBoxBagDispenser

So go ahead, keep the bags!  This is an easy organizational win, guys.  Try one of these great products in your home and tell me how much you love it!

Giving Back: Back to School

For many, back-to-school time conjures fond memories of a new box of crayons and an awesome Trapper Keeper, buying your first scientific calculator, or even family trips to the store where you got to fill a shopping cart with items checked off of your school supply list.  But for many, back-to-school time isn’t as carefree.  For the approximately 23,000 homeless children in New York City, preparation to go back to school is stressful.  They know that without access to the right school supplies, a successful year can be challenging. 

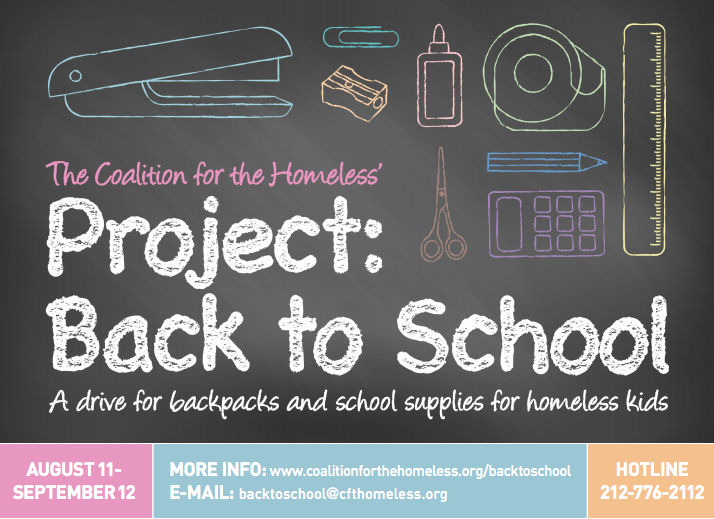
No one understands this better than the incredible non-profit organization Coalition for the Homeless, which offers services and advocacy for New York’s homeless population.  To help ensure a solid education for as many of our city’s students as possible, the Coalition for the Homeless started Project: Back to School.  In the seven years since its inception, this program has donated thousands and thousand of backpacks filled with school supplies to New York’s homeless youth in time for each new school year. 

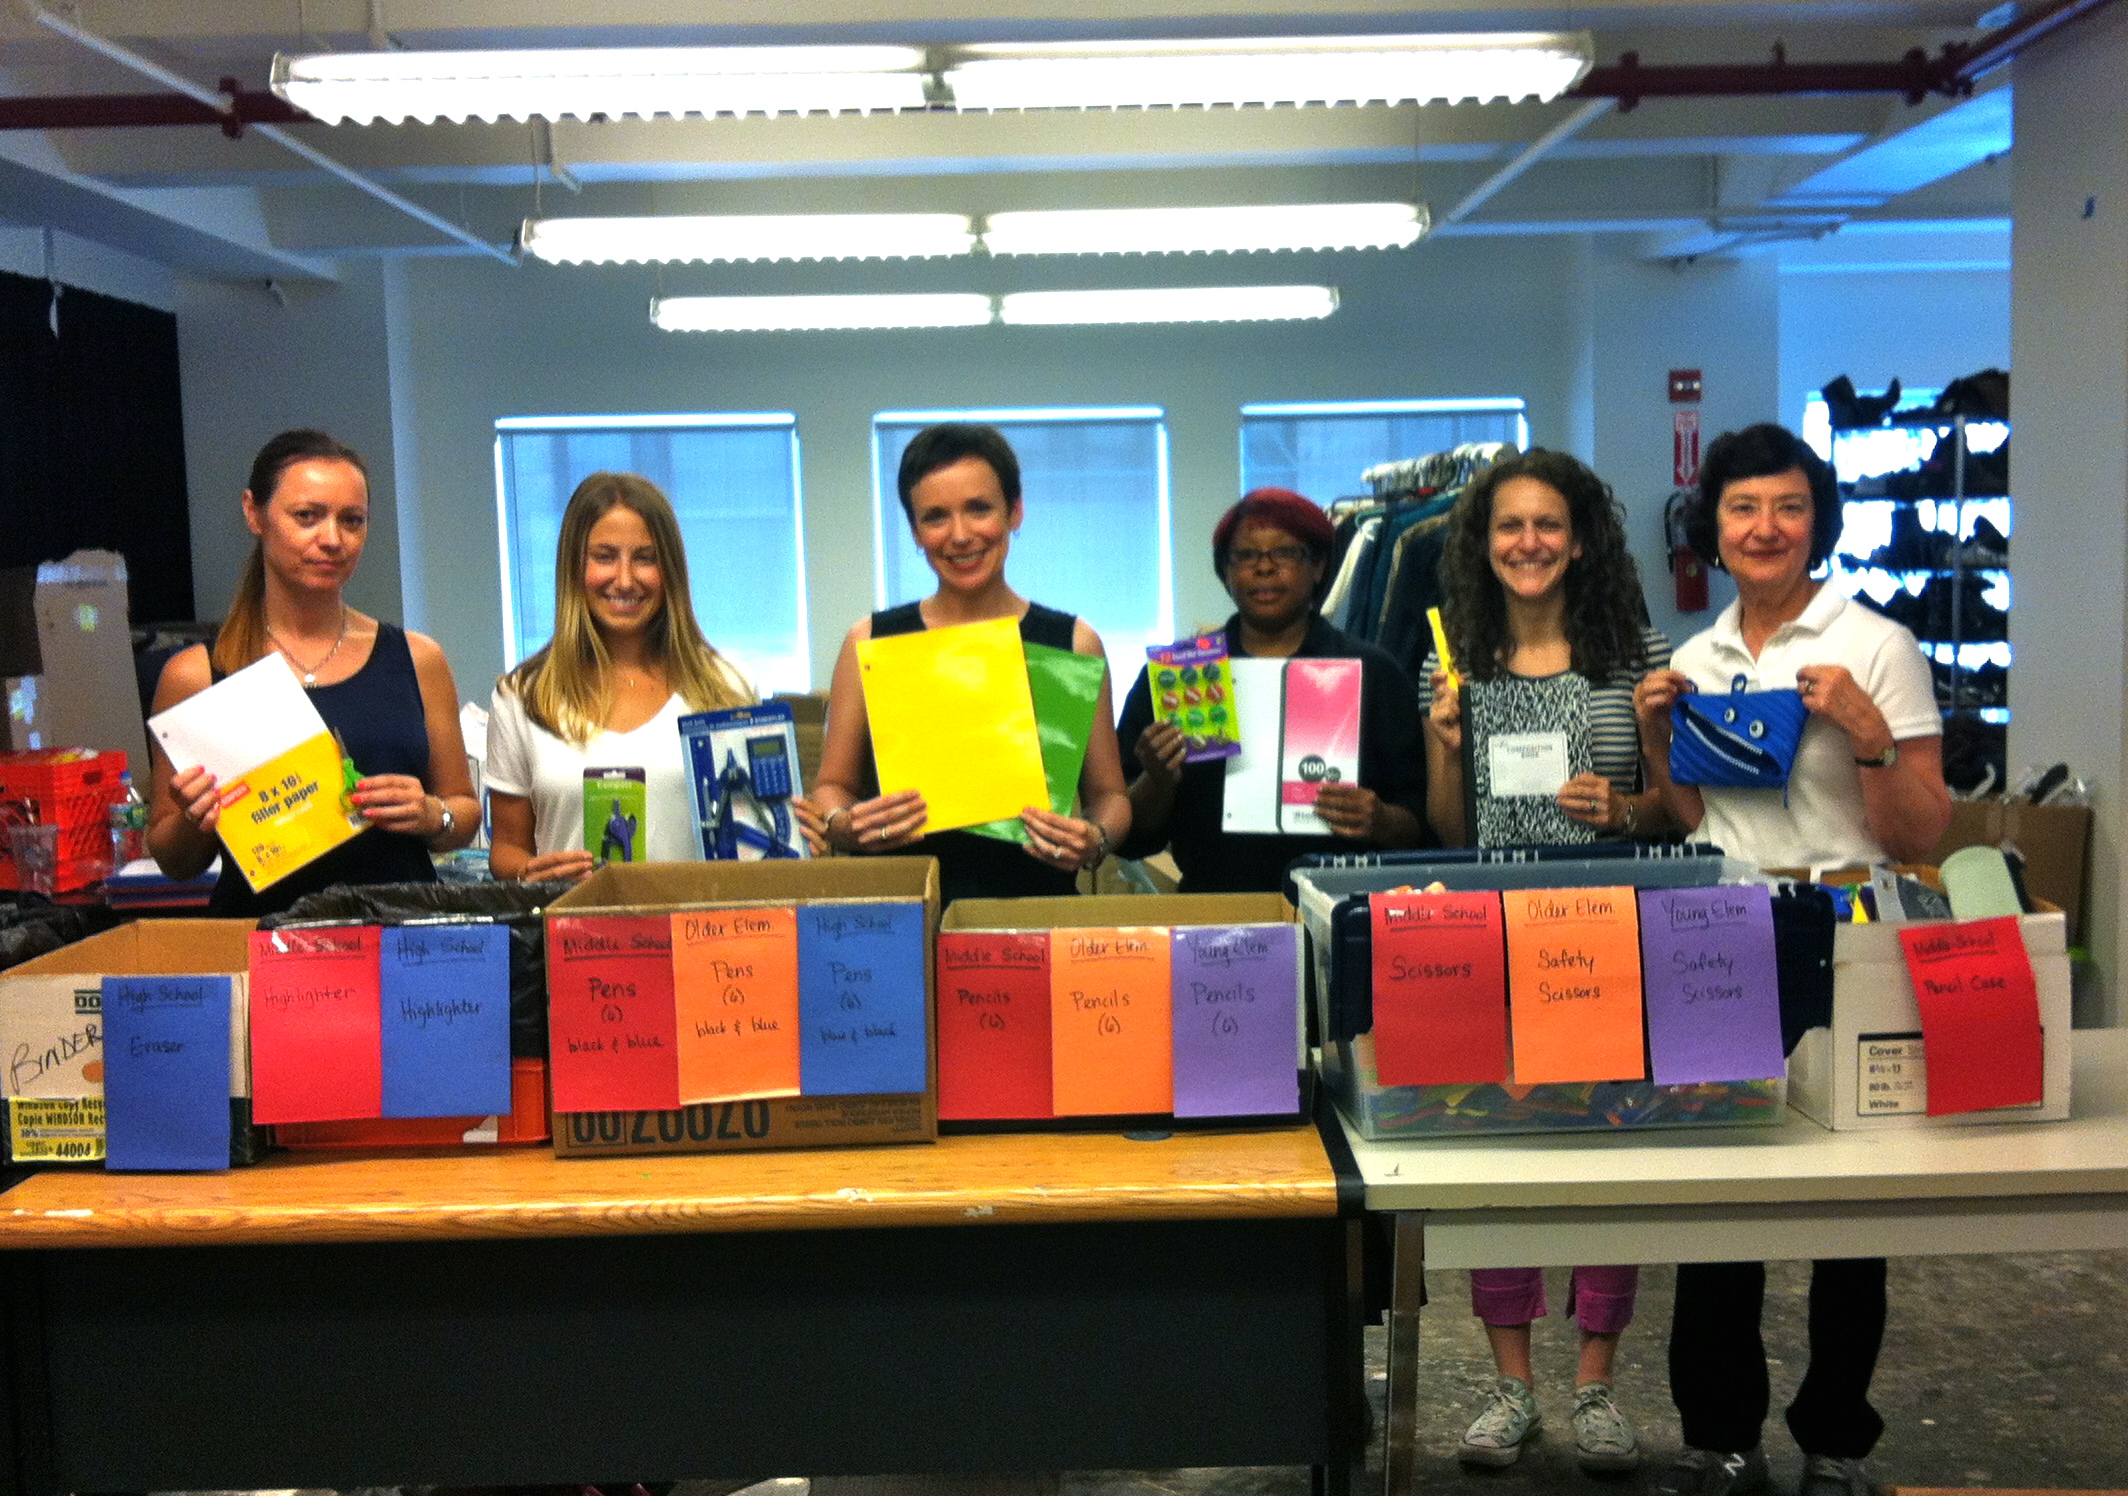
A few weeks ago, I joined other volunteers from NAPO New York and spent a morning helping the CFH get organized for this year’s Project.  We sorted school supplies, unpacked new backpacks, sifted through donations, and set up one stellar assembly line so that over three thousand backpacks could be filled.  During this process, I learned that this amazing program uses unique school supply lists for young and older elementary, middle school and high school students.  Only the best quality supplies are used.  Anything not deemed of appropriate condition for the students is used in one of the CFH’s many other programs, or in their corporate office.  Nothing goes to waste.

IMG_5298.JPG

I am proud to have contributed to the education of our youth.  As you clean out your family’s supply closet during this back-to-school season or shop for your own children, think about what you can contribute.  Help your family get an organized start to this school year while you help children in need get off to a successful one.  See below for how and what to contribute:


HOW: Where to Donate

Ship: You can send supplies directly to 129 Fulton Street, New York, NY 10038

Drop Off:  For anyone in Manhattan, all you have to do is gather your supplies, and drop them off at:

  • ANY Manhattan Mini Storage location
  • The JCC, located at 334 Amsterdam Avenue, New York, NY 10023.  M-TH: 5:30am-11pm, F: 5:30am-10pm, S-Su: 7am-10pm

For any other borough, click here to see all of your drop-off locations.


WHAT:  Items on Their Wish List

  • Backpacks
  • #2 Pencils
  • Pencil Cases
  • Erasers
  • Crayons 
  • Washable Markers
  • Elmer’s Glue
  • Coloring Paper


  • Pencil Sharpeners
  • Glue Sticks
  • 1” Binders
  • Pocket Folders
  • Rulers
  • Scientific Calculators
  • Composition and Spiral  Notebooks
  • Safety Scissors

Wishing you all a happy, organized and successful back-to-school season!

Simply Inspired Spaces

Hi, and welcome to my blog!  I’m an organized girl living in a disorganized world.  I’m also a Professional Organizer and declutterer.  Amidst the chaos of my amazingly frenetic city of New York, staying organized allows me to find the time to do the things I truly love - like spending time with my husband, friends, and family, soaking up the culture of Manhattan, cozying up with a good book, cooking, and traveling. 

I believe that spaces should be designed to inspire you, and allow you to be efficienct with whatever you want to accomplish.  Kitchens should inspire you to cook, to eat, or to mingle with family.  Offices should encourage you to produce, bedrooms to relax and sleep, children’s playrooms to play and learn.  I help design spaces and systems that inspire you to use your spaces in whatever way you need.  How can you cook efficiently if you don’t have easy access to the tools you need, or if you can’t see the ingredients available to you?  How can you quickly get out the door in the morning or create that perfect night-out look if you can’t find the clothes in your closet?

I was born with a penchant for being organized, but I do believe that being an organized person is part nature, part nurture.  That’s why I spend a great deal of time scouring the world for the latest and greatest tips to keep my life, and my clients’ lives, organized.  And while I spend a lot of time on this, I realize that many of you out there have neither the time nor the desire to do that, but you crave organization just like I do.  That’s why I’ve created this blog – to share my tips and insights with you. 

My philosophy is that organization isn’t complete without design, and design without function is nothing more than a beautiful piece of art.  But a space, whether it be a physical space, a virtual space, or your headspace, with both function and design?  Now that’s simply inspired.  Check back often, or sign up for my newsletter, for advice to help you stay inspired, stay organized, and simply do the things you want to do in life.  And follow me on Pinterest, Facebook and Twitter.

Feel free to leave questions or responses to my posts in the comments section of each post.  I love to get feedback!

In a complicated world, I’m here trying to keep your life simply inspired.

 Stay inspired,

Samantha